Combining Chalk Pastels and Cream Pastels | A Fast and Fun Demo to Try

Mixed media artist Gwen Lafleur of StencilGirl wanted to experiment with chalk pastels and cream pastels. Below, she shares a fun, step-by-step demonstration on how to use both in the same art project for colorful, eye-catching results.
Chalk Pastels and Cream Pastels | Fast and Fun Ways to Use Both
As a self-confessed art-supply junkie, I’m always eager to try out new supplies and find new uses for products I already have. With the Chalk Pastel and Cream Pastel Sets from Jane Davenport for American Crafts™, I had the best of both worlds. I could try the playful new colors of the traditional chalk pastels, and the velvety texture and rich colors of the cream pastels.

In order to find different ways to use these products, I experimented with a variety of techniques and substrates. I used both sets with stencils, added color to drawings, and even used the pastels as watercolors. The results of my tests worked perfectly to form a fun and colorful art journal spread, which I want to share with you.
In the Stencil Girl eBook learn how to make great stencil art with this stencil art book filled with project ideas for all skill levels. Enjoy!
Materials
- Jane Davenport Chalk Pastel Set and Cream Pastel Set from American Crafts
- Pastel paper
- Mixed-media paper (I used 90-lb. paper.)
- Golden® Artist Colors Acrylic Ground for Pastels
- Sponge applicators, included with the pastel sets
- Stencils (I used stencils from StencilGirl Products, including Damask Stencil by Michelle Ward, Urban Insiders Circle from Seth Apter, and my Art Deco Sunburst Background stencil.)
- Pencil
- Pen (I used a black Fude Ball pen.)
- Watercolor paper (I used 140-lb. cold-press paper.)
- Water brush
- Art journal
- Collage papers
- Matte medium
- Paintbrush (I use inexpensive brushes with mediums.)
- Acrylic paint (I used PaperArtsy Fresco Finish Chalk Acrylics.)
- Inkpads (I used Ranger Archival Inks in brown and black.)
- Paint pen (I used a gold paint pen.)
- Workable fixative spray
- Soft gel medium (I used glossy.)
- Iridescent Gold fluid acrylic paint
- Fineline Applicator
1. Testing Surfaces
To get a sense of how the pastels would work on different surfaces, I started with the chalk pastels and a few stencils using pastel paper, mixed-media paper and mixed-media paper coated with Acrylic Ground for Pastels. I applied the chalk colors directly through the stencils with the sponge applicator, using multiple colors to see how saturated the pigments were. I repeated this process with the Cream pastels. With the colors applied over a ground, the result wasn’t as smooth, but the colors were more saturated than on the other two papers, especially with the chalk pastels. The ground adds a coarse tooth that helps capture the particles of the chalk pastels. Among the three papers, I preferred the look I got using the uncoated mixed-media paper. The colors on the pastel paper seemed a bit dull.

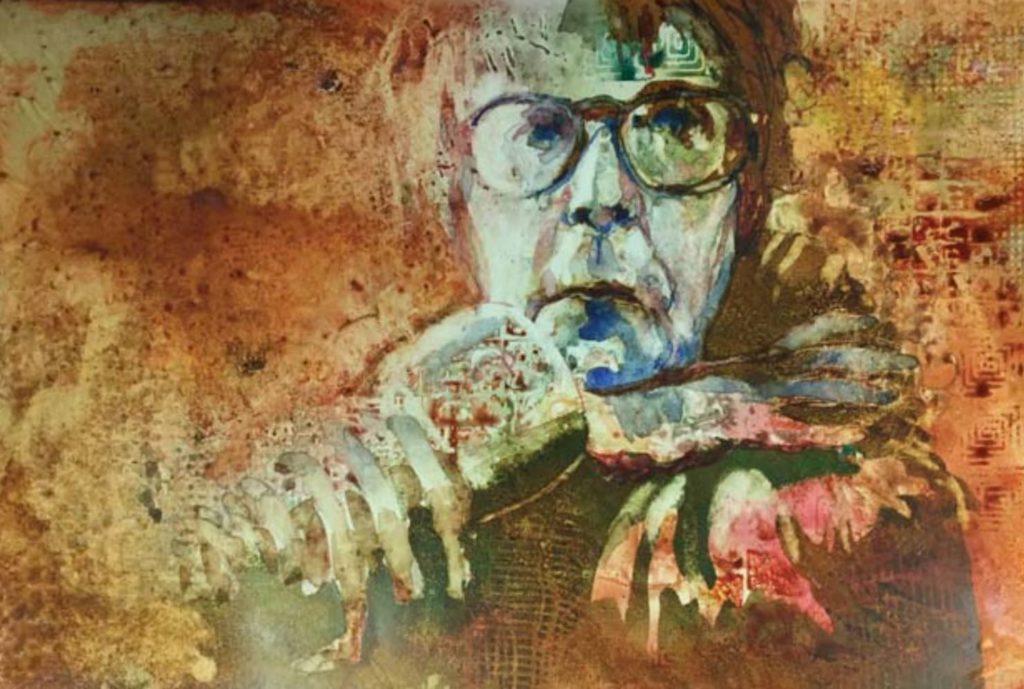
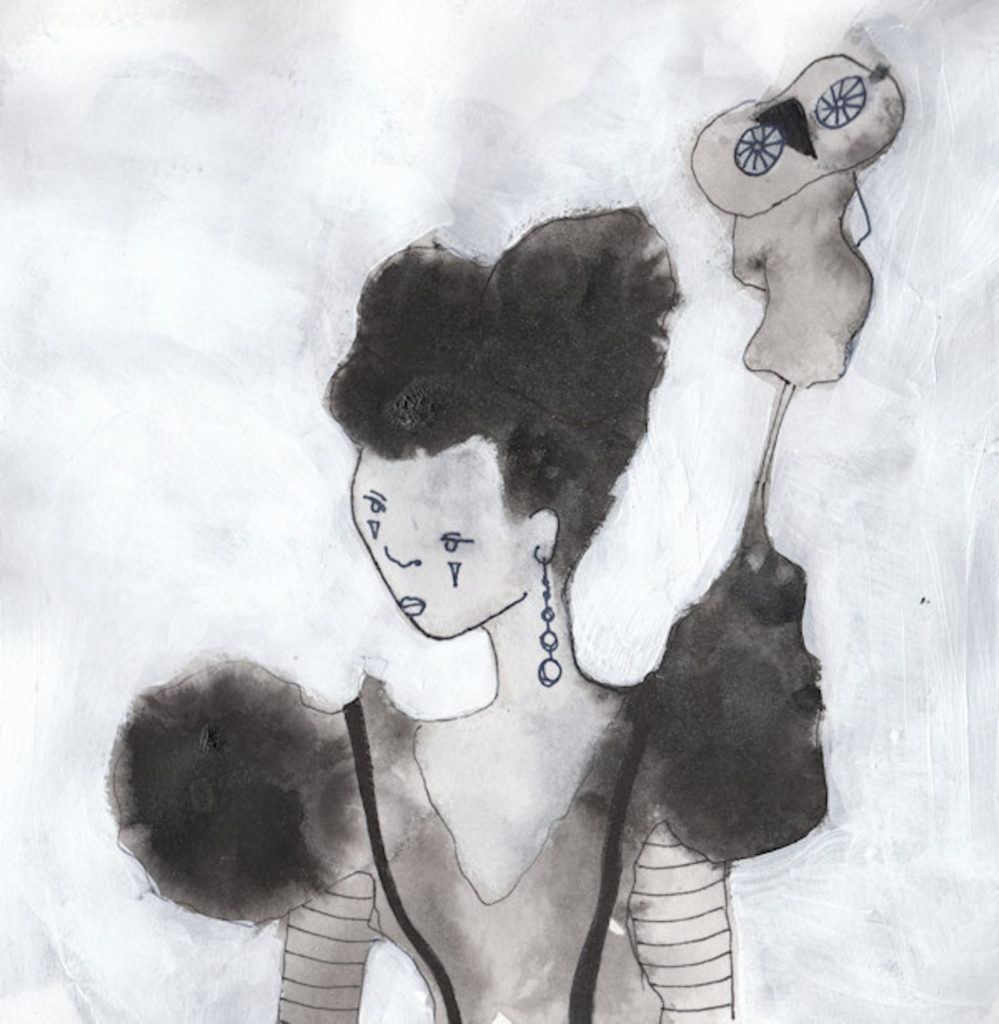
2. Exploring Colors
I wanted to try coloring an image with pastels, so I sketched a bird and a water lily using pencil on the same three types of paper as before. (You can also color stamped images.) I found it difficult to get detailed areas of color with the chalk pastels, even using different applicators such as PanPastel® Sofft™ tools with different shaped tips. Instead, I added larger swaths of color and then used a black Fude Ball pen to draw details on top of the pastels. The cream pastels worked better with this approach. They blended beautifully.

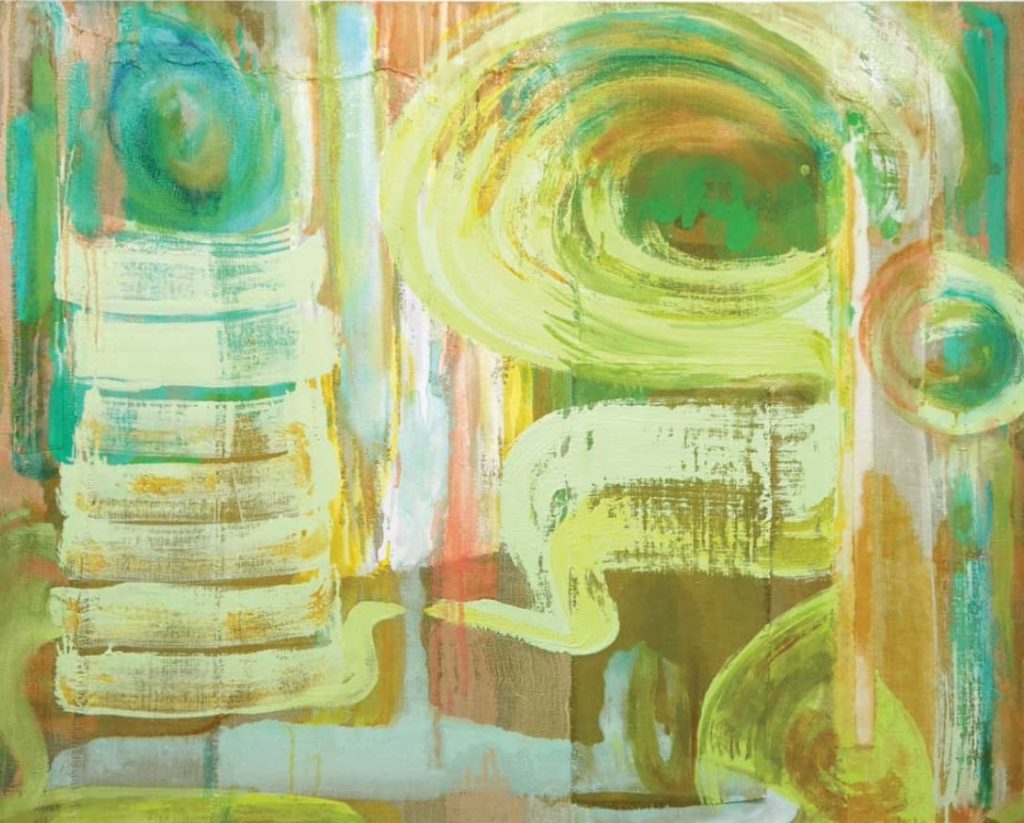
3. Experimenting with Water Brushes
Next, I used the pastels as watercolors. I swiped a water brush across each of the pastels, then painted stenciled images. For this test, I used mixed-media paper, with and without ground, and watercolor paper. Although the cream pastels gave me more saturated colors and more even coverage in my first two tests, the chalk pastels worked much better in this instance. I could blend and layer the chalk pastels easily. And, once the water on the palette dries, the chalk pastels can still be used with a sponge applicator. I was skeptical that these would not work as well with the cream pastels, and I was right. I wouldn’t use the cream pastels this way again, but it was worth trying.

4. Getting Started
With a better sense now of how the pastels worked best, I opened my art journal and added collage and scrap papers to a spread, adhering them with matte medium and covering the pages. Next, I dry-brushed acrylic paints over the top to integrate the papers and tone down the patterns on the papers. When the page was dry, I inked the edges of the pages and ran a gold paint pen along the very edge. I then added layers of pattern using cream pastels with stencils, since I knew from my experiments that they would give me the saturation, crisp lines and coverage that I wanted. Finally, I sprayed both the background and my test papers with a workable fixative. Almost all of the images you can see in the photo are stencils.

5. Adding the Details
With the background complete, I went back to my experiments and selected the best images. I tore them from the various sheets and auditioned them on the background. Once I settled on an arrangement, I adhered the components to the background using soft gel medium. I added a few more pen marks, such as lines on the feathers and more detail on the birds, and the page was ready for the finishing touches.

6. Finishing Touches
The spring-like feel of the page made me think of change and re-birth. I stenciled the word “transform” for the title and added journaling around the edges of the spread with a black Fude Ball pen. I finished by scribbling a rough frame in gold paint using a Fineline Applicator.

About the Artist
Gwen Lafleur is a mixed-media artist and teacher out of South Jordan, Utah. She is also a creative team member and stencil artist for StencilGirl Products. You can learn more from Gwen in her StencilGirl eBook, available now. Article and accompanying images, by Gwen Lafleur, first appeared in our sister publication, Cloth Paper Scissors.


Very informative and inspiring. Thank you so much.
I want to gain inspiration with regard to textures to be used in abstract painting